Step-by-Step Guide: Installing an Air Conditioner in a Window
Introduction
Welcome to our step-by-step guide on installing an air conditioner in a window. Whether you live in a hot climate or simply want to cool down during the summer months, having an air conditioner can significantly improve your comfort at home. In this guide, we will walk you through the process, providing detailed instructions and useful tips to help you successfully install an air conditioner in a window.
Understanding the Importance of Air Conditioning
Air conditioning plays a crucial role in maintaining a comfortable indoor environment, especially when external temperatures soar. It helps regulate the temperature, control humidity levels, and improve air quality. By installing an air conditioner in your home, you can ensure that you and your family stay cool and comfortable throughout the warmer months.
Benefits of Installing an Air Conditioner in a Window
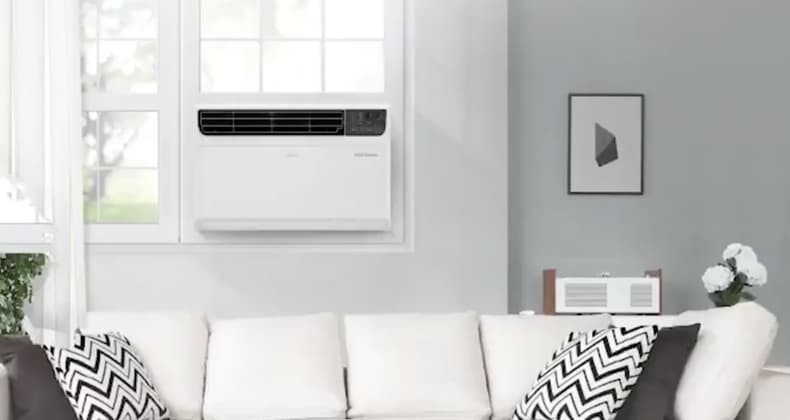
There are several advantages to installing an air conditioner in a window. Firstly, window units are more affordable compared to central air conditioning systems, making them a popular choice for many homeowners. Additionally, they are easy to install and require minimal maintenance. Window air conditioners also provide localized cooling, allowing you to cool specific areas within your home, making them energy efficient compared to cooling the entire house.
Installing an air conditioner in a window can also offer flexibility. If you live in an apartment or rental property, window units can be easily removed and taken with you when you move. Furthermore, they do not require any major renovations or modifications to your home, making them a convenient option for temporary cooling solutions.
Now that you understand the importance and benefits of air conditioning, let's move on to the next section of our guide: preparing for installation.
Step 1: Planning and Preparation
Choosing the right window for installation
Before getting started with installing an air conditioner in your window, it's important to choose the right window for the task. Ideally, you should select a window that is close to an electrical outlet and has enough space to accommodate the unit. While most air conditioners are designed to fit standard windows, it's crucial to ensure that your window is compatible with the unit you plan to install.
Measuring the window dimensions
To ensure a proper and secure fit, it's essential to measure the dimensions of your window accurately. Start by measuring the width and height of the window opening, taking into account any obstacles that might hinder the installation. This will help you determine the appropriate size of the air conditioner you need.
Determining the BTU requirements for your space
Now that you have chosen the window and measured its dimensions, it's time to determine the BTU (British Thermal Units) requirements for your space. BTU is a unit of measurement that represents the cooling capacity of an air conditioner. To calculate the BTU needed for your room, consider factors such as the room size, insulation, number of windows, and heat-generating appliances. This step is crucial to ensure your air conditioner is capable of cooling the area effectively.
By following these initial steps of planning and preparation, you are setting yourself up for a successful air conditioner installation. Choosing the right window, measuring accurately, and determining the BTU requirements are important factors in ensuring that your air conditioning unit not only fits seamlessly into your window but also cools the designated space effectively. So, let's move on to the next step and get started with the installation process.
Step 2: Gathering the Necessary Tools and Equipment
Now that you have measured your window and determined the appropriate size for your air conditioner unit, it's time to gather all the tools and equipment you will need for the installation process. By having everything on hand, you'll be able to complete the installation smoothly and efficiently.
Air conditioner unit
First and foremost, you'll need the air conditioner unit itself. Make sure it is the appropriate size for your window and is capable of cooling the desired area. Measure your window opening beforehand to ensure you purchase the correct-size unit.
Support brackets
Support brackets are essential for stabilizing the air conditioner unit in the window frame. These brackets help distribute the weight of the unit evenly and prevent it from falling out of the window. Make sure to choose sturdy brackets that are specifically designed for window air conditioners.
Screws and screwdriver
You will need screws and a screwdriver to secure the support brackets to the window frame. The screws should be durable enough to hold the weight of the unit and the brackets securely in place. Make sure to choose screws that are suitable for the type of material your window frame is made of.
Foam insulation strips
Foam insulation strips are used to fill the gaps between the air conditioner unit and the window frame. This helps to prevent air leaks and maintain optimal cooling efficiency. Choose foam insulation strips that are the appropriate size and thickness for your window.
Level
A level is necessary to ensure that the air conditioner unit is installed evenly and does not tilt to one side. This will help prevent any water leakage or improper functioning of the unit. Make sure the level is long enough to span the width of your window opening.
Measuring tape
A measuring tape is essential for accurate measurements of your window opening and the air conditioner unit. This will help you determine the correct position for installation and ensure a proper fit.
By having all these tools and equipment ready, you are now prepared to move on to the next step in the installation process.
Step 3: Preparing the Window Area
Cleaning the window and window sill
Before installing an air conditioner in your window, it's essential to clean both the window and the window sill thoroughly. Start by removing any dirt, debris, or dust from the window and sill using a brush or a vacuum cleaner. This step ensures a clean and stable foundation for the installation, preventing any potential damage or hindrances.
Removing any obstacles or obstructions
Next, check for any obstacles or obstructions that might impede the proper installation of your air conditioner. Clear the window area of any furniture, curtains, or blinds that may interfere with the installation process. It's crucial to have a clear and unobstructed path to ensure a seamless installation and proper functioning of your air conditioner.
Checking window condition for stability
Before proceeding further, assess the condition of your window to ensure its stability. Look for any cracks, loose frames, or signs of wear and tear. If you notice any issues, it's advisable to address them before proceeding with the installation. A stable window ensures the safety and efficiency of your air conditioner, preventing any potential accidents or damages.
By carefully following these steps to prepare the window area, you create an optimal environment for the installation of an air conditioner. Cleaning the window and window sill removes any dirt or debris that could affect the installation process. Removing obstacles ensures a clear path for installation, preventing any obstructions. Checking the window's condition for stability guarantees the safe and efficient functioning of your air conditioner. So, before you move on to installing the air conditioner, take the time to properly prepare the window area.
Step 4: Installing Support Brackets
Positioning the support brackets
Now that you have prepared the window and inserted the air conditioner unit, it's time to install the support brackets. These brackets are essential as they will keep the air conditioner securely in place and prevent any accidents or damage.
Start by measuring the width of your window frame to determine where the support brackets should be positioned. Generally, you will want to place one bracket on each side of the unit for maximum stability. Carefully mark these positions on both sides of the window frame.
Ensuring proper alignment and level
Before proceeding, double-check that the window is fully open and there are no obstructions in the way. Then, hold one support bracket against the wall, aligning it with the marked position. Make sure it is level using a spirit level or a laser level to ensure that the air conditioner will sit straight.
Securing the brackets with screws
Once the brackets are properly positioned and leveled, it's time to secure them in place. Using a power drill and appropriate screws for your window frame material, carefully screw the brackets into the wall. Be sure to use the appropriate screw length to ensure a secure hold.
Ensure that the brackets are tightly fastened and able to support the weight of the air conditioner unit. Gently tug on the brackets to confirm their stability.
Congratulations! You have successfully installed the support brackets for your window air conditioner. Now you can move on to the next step, which involves sealing any gaps around the unit to ensure optimal efficiency.
Step 5: Installing Foam Insulation Strips
Now that you have securely positioned your air conditioner in the window frame, it's time to enhance its insulation and prevent any air leaks. This is where foam insulation strips come into play.
Cutting foam insulation strips to fit window dimensions
To begin, carefully measure the dimensions of your window frame. Ensure that you have accurate measurements, as this will determine the length of the foam insulation strips you need. Once you have the measurements, use a utility knife or scissors to cut the foam insulation strips accordingly. It's important to note that the strips should match the width and height of the window frame precisely, leaving no gaps or exposed areas.
Applying the strips to prevent air leaks and enhance insulation
With the foam insulation strips cut to size, it's time to apply them. Starting from the bottom of the window frame, peel off the adhesive backing from one side of the foam strip and attach it firmly against the window sash. Make sure to press it down firmly to ensure a secure seal. Continue the process by applying the remaining strips, working your way up the sides of the window frame until you reach the top. Take extra care to press down on the strips to ensure optimal insulation and prevent any air from escaping.
By installing the foam insulation strips, you are creating a barrier that will prevent outside air from entering the room and conditioned air from escaping. This will significantly improve the energy efficiency of your air conditioner by reducing the workload on the unit and enhancing overall performance.
Congratulations! With the foam insulation strips successfully installed, your air conditioner is now ready to provide you with the desired cooling comfort throughout the hot summer months.
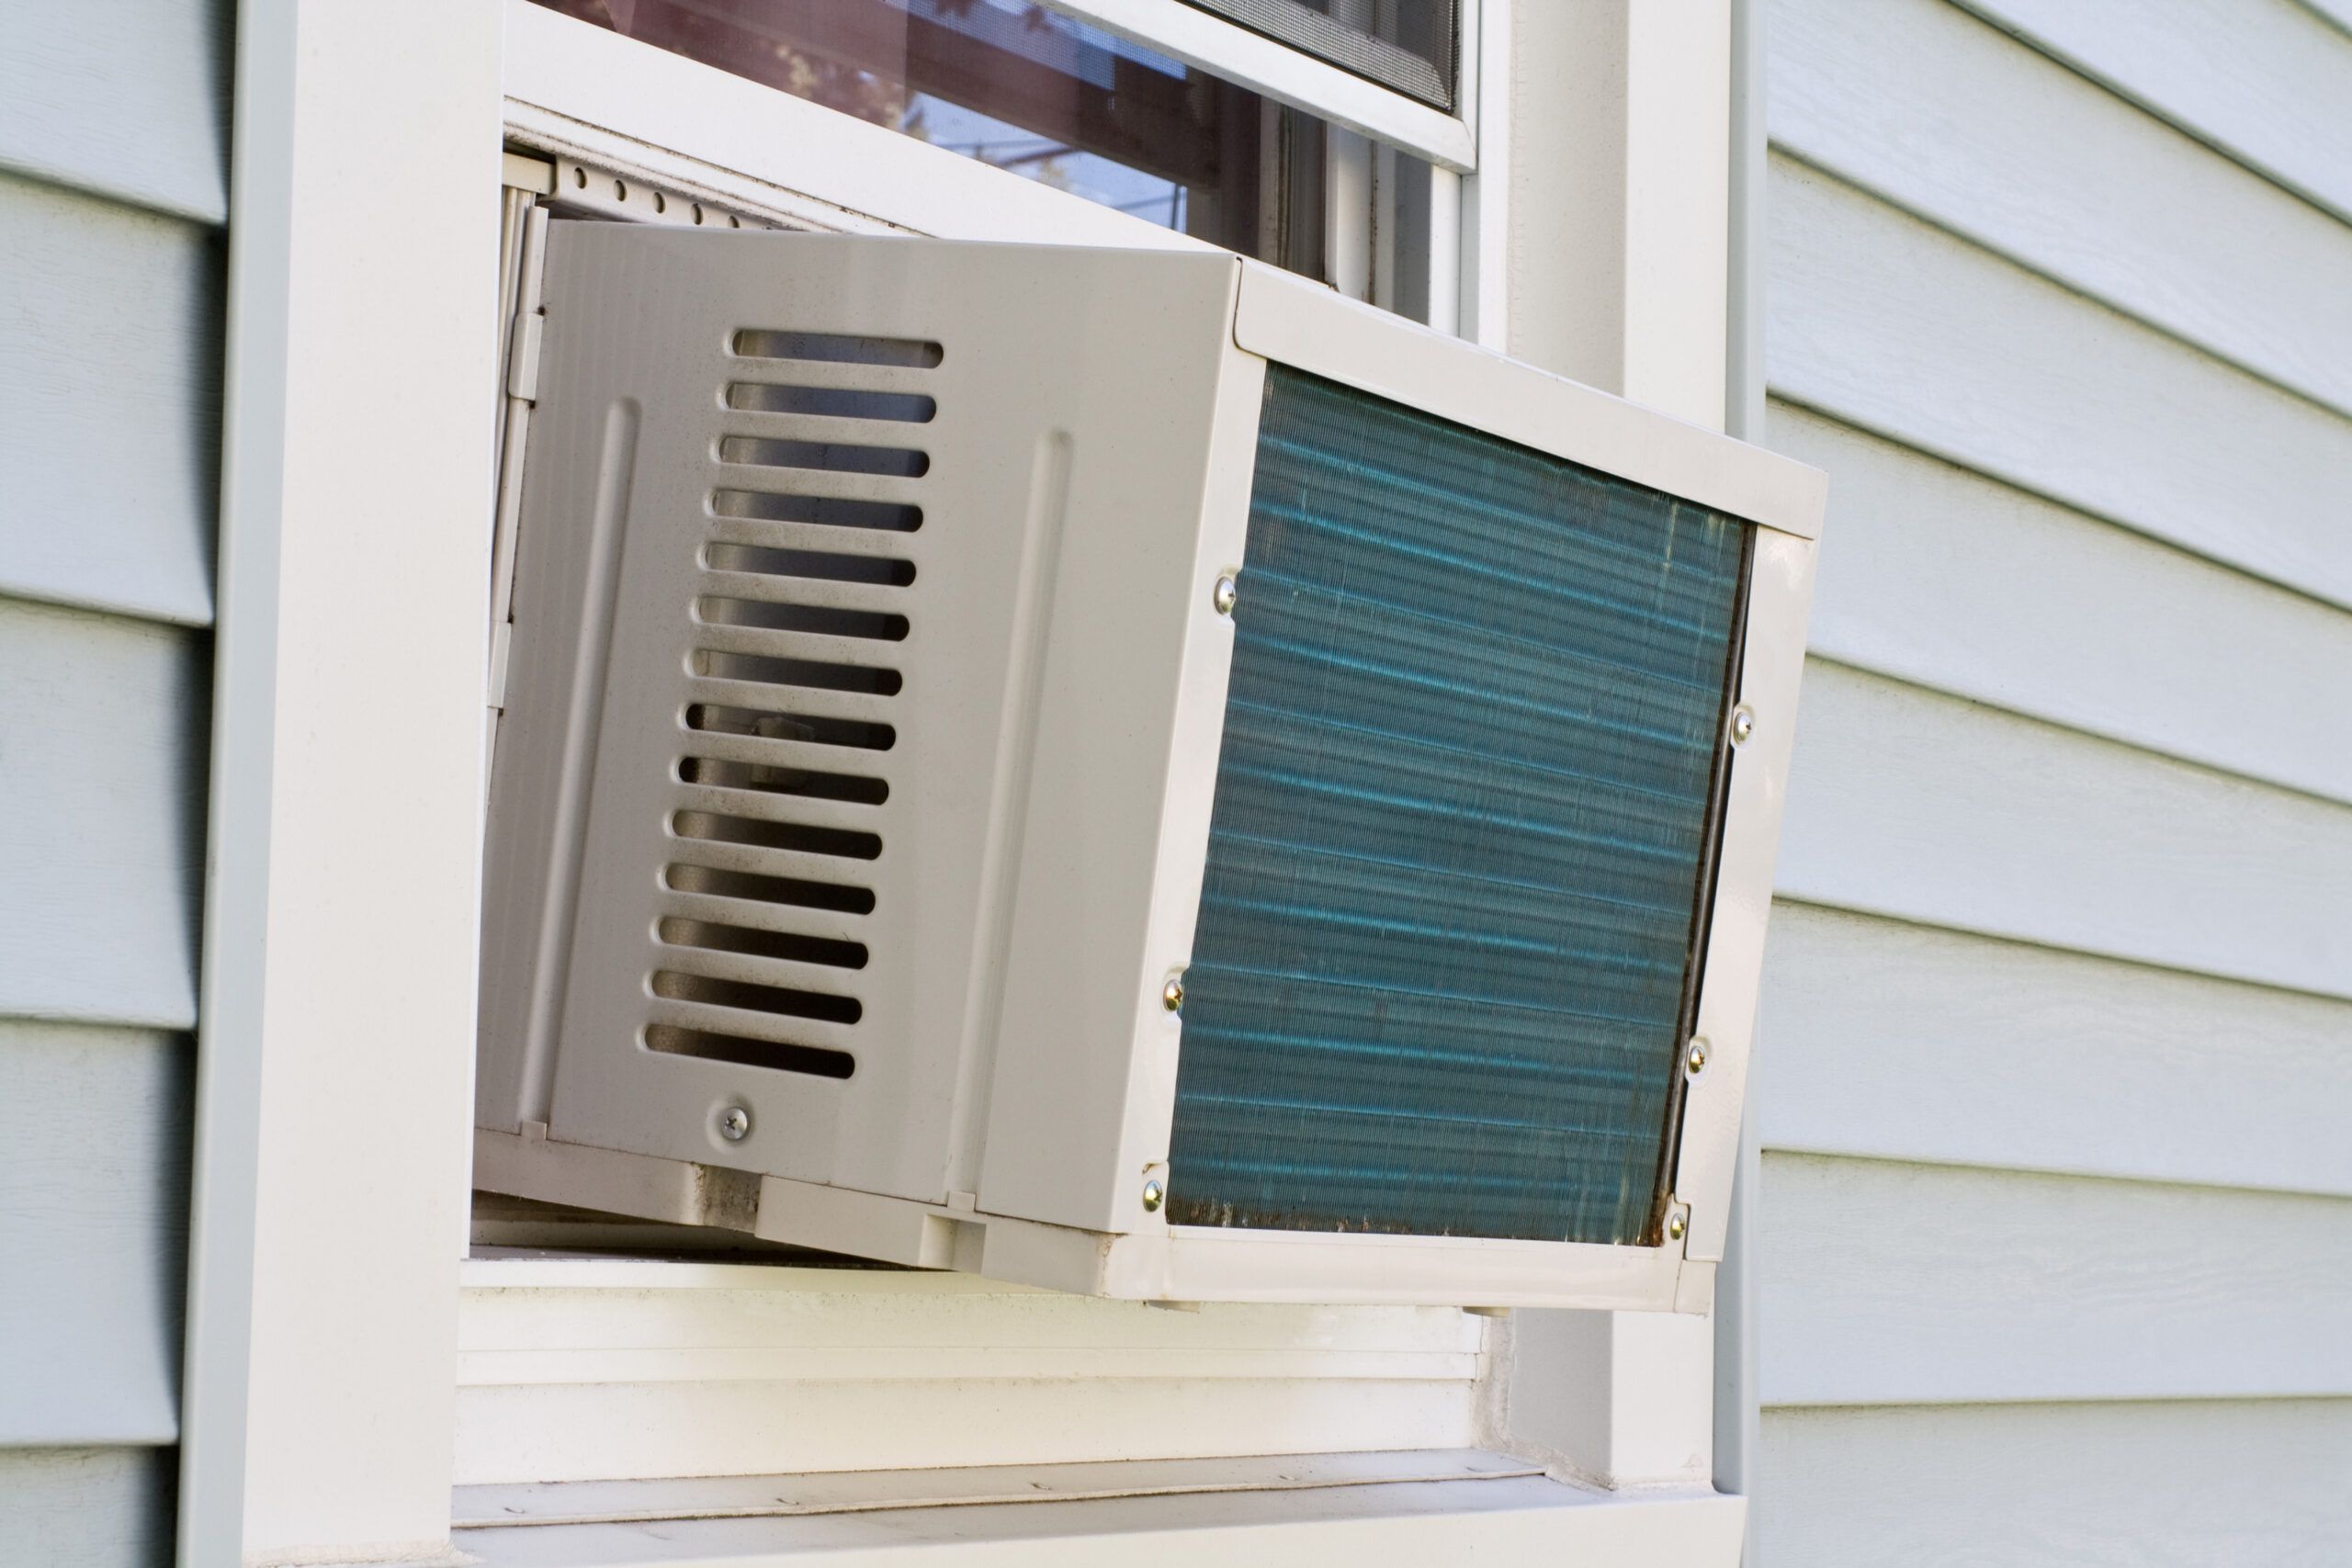
Step 6: Mounting the Air Conditioner Unit
Now that you have properly prepared your window and installed the support brackets, it's time to mount the air conditioner unit itself. Follow these simple steps to ensure a secure and effective installation.
Placing the air conditioner on the window sill
Start by carefully lifting the air conditioner and placing it onto the window sill. Make sure it is centered and aligned properly. You may need assistance with this step, as the unit can be heavy and awkward to maneuver.
Aligning the unit with the support brackets
Once the unit is on the window sill, align it with the support brackets. These brackets will help hold the unit securely in place. Take your time to ensure that the unit is level and flush against the window frame. This will prevent any unnecessary gaps that could allow hot air to seep in from outside.
Securing the unit to the brackets
After aligning the unit, locate the screw holes on the side of the air conditioner. Insert the screws provided with your installation kit into these holes, securing the unit to the support brackets. Make sure to tighten the screws securely, but be careful not to overtighten and damage the unit.
Once the unit is securely fastened to the brackets, give it a gentle shake to test its stability. If it feels loose or wobbly, double-check the alignment and tighten the screws as necessary. A properly mounted air conditioner should be secure and stable, allowing for smooth and efficient operation.
By following these step-by-step instructions, you can successfully mount your air conditioner unit in your window. With the unit securely in place, you are now ready to enjoy the cool comfort it will provide during those hot summer months. Stay cool and beat the heat!

Step 7: Insulating and Sealing
Using additional foam insulation strips if necessary
Now that you have successfully installed your air conditioner in the window, it's time to ensure that it is properly insulated and sealed. This step is crucial to prevent cold air from escaping and hot air from entering your space, ultimately maximizing the efficiency of your air conditioner.
Inspect the gaps between the window frame and the air conditioner unit. If you notice any significant openings, you may need to use additional foam insulation strips to seal these gaps. Measure the length and width of the gaps and cut the foam insulation strips accordingly. Peel off the backing and press the strips firmly into place, ensuring a tight seal all around.
Sealing any gaps with caulk or weatherstripping
In addition to using foam insulation strips, you might need to seal smaller gaps with caulk or weatherstripping. Load a caulk gun with the caulk of your choice and apply a thin bead along the gaps, making sure to fill them completely. Smooth the caulk with your finger or a caulking tool for a neat finish. Alternatively, you can use weatherstripping—a self-adhesive material—to seal the gaps effectively.
Applying window film for further insulation
To further improve the insulation, consider applying window film to the glass pane. Window film helps to block out harmful UV rays, reduce glare, and increase energy efficiency by preventing heat transfer. Start by thoroughly cleaning the glass surface. Then, measure and cut the window film slightly larger than the dimensions of the glass pane. Apply the film using a spray bottle filled with a mixture of water and a few drops of dish soap. Smooth out any wrinkles or air bubbles using a squeegee or a credit card. Trim any excess film and let it dry completely.
By properly insulating and sealing your air conditioner, you can ensure that your space stays cool and comfortable while minimizing energy wastage.
Step 8: Testing and Adjusting
Congratulations! You've successfully installed your air conditioner in the window, and now it's time to put it to the test. In this step, we'll guide you through the process of plugging in the air conditioner, adjusting the settings and temperature, and ensuring proper cooling functionality.
Plugging in the air conditioner
Before plugging in the air conditioner, make sure that the unit is positioned securely in the window and the window is fully closed and locked. Locate the power cord and plug it into a nearby electrical outlet. Ensure that the outlet can handle the voltage required by the air conditioner. Avoid using extension cords as they can cause overheating and damage the unit. Once the air conditioner is plugged in, you should hear a click or a beep, indicating that it's receiving power.
Adjusting the settings and temperature
Most air conditioners come with a remote control or a control panel located on the unit itself. Use the remote control or the buttons on the control panel to adjust the settings and temperature according to your preferences. Start by selecting the cooling mode, and then choose the desired temperature. It's recommended to set the temperature between 72-78 degrees Fahrenheit for optimal comfort and energy efficiency. You can also adjust the fan speed and select additional features such as sleep mode or timer settings, if available.
Ensuring proper cooling functionality
Once you've set the temperature and adjusted the settings, make sure to monitor the air conditioner for a few minutes to ensure proper cooling functionality. Check that cool air is coming out of the vents and that the room temperature starts to drop. Keep an eye on the thermometer to see if the desired temperature is reached. If you notice any issues or if the air conditioner is not cooling effectively, double-check that the unit is properly installed and that there are no obstructions blocking the airflow.
Now that you've completed all the steps, you can sit back, relax, and enjoy the comfort of a cool and pleasant environment. With your newly installed air conditioner, you can beat the summer heat and create a refreshing oasis in your home or office. Stay cool!
Step 9: Maintenance and Safety Tips
After successfully installing your air conditioner in a window, it's important to know how to properly maintain and use it to ensure optimal performance and longevity. Regular cleaning and maintenance of the air conditioner, as well as following safety precautions, are key factors in keeping yourself and the unit safe.
Regular cleaning and maintenance of the air conditioner
To ensure that your air conditioner operates efficiently, it's crucial to clean it regularly. Start by turning off the unit and unplugging it from the power source. Remove the air filter and clean it with a mild detergent and water. Allow it to completely dry before placing it back in the unit. It's recommended to clean the filter every two weeks during peak usage.
Additionally, inspect the coils for dirt and debris buildup. Use a soft brush or vacuum attachment to gently remove any dirt. Avoid using excessive force to prevent damaging the coils. Clean the exterior of the unit using a damp cloth, making sure to remove any dust or dirt from the vents.
Safety precautions to follow while using the unit
When using an air conditioner, it's essential to prioritize safety. Firstly, ensure that the unit is securely installed in the window, following the manufacturer's instructions. Double-check that there are no loose connections or gaps between the unit and the window frame.
Avoid using extension cords to plug in your air conditioner, as they can overheat and cause a fire hazard. Instead, plug the unit directly into a grounded electrical outlet. If you notice any frayed or damaged cords, immediately replace them.
Lastly, be cautious when adjusting the temperature settings. Sudden temperature changes can put a strain on the unit and result in malfunctions. It's recommended to adjust the temperature gradually to maintain a comfortable and efficient cooling environment.
By regularly cleaning and maintaining your air conditioner and adhering to safety precautions, you can enjoy a cool and comfortable living space while ensuring the longevity and efficiency of your unit. Stay safe and stay cool this season!

Conclusion
Enjoying the benefits of a properly installed window air conditioner
Congratulations! You have successfully installed your air conditioner in a window, and now you can enjoy the comfort and relief it brings during hot and humid weather. By following this step-by-step guide, you have ensured that your installation is both efficient and effective.
Efficiency and comfort during hot and humid weather
During the scorching summer months, having a properly installed air conditioner can make a world of difference. It not only provides a cool and comfortable environment but also helps to maintain a consistent temperature and humidity level in your home. This can significantly improve your quality of life, allowing you to sleep better, concentrate more easily, and feel more relaxed throughout the day.
By installing your air conditioner correctly, you can maximize its efficiency and effectiveness. Proper installation ensures that the unit is securely mounted in the window, preventing any air leaks that could decrease its cooling capacity. It also allows for proper ventilation, as a well-installed air conditioner will have a clear airflow path both inside and outside the window. This helps the unit to cool the room more efficiently, saving energy and reducing your utility bills.
Remember to clean and maintain your air conditioner regularly to ensure its smooth operation. Remove and clean the air filters, as a dirty filter can obstruct airflow and reduce the unit's efficiency. Also, keep the condenser coils clean, as dust and debris can accumulate and hinder the cooling process. By taking care of your air conditioner, you can extend its lifespan and enjoy years of reliable and efficient cooling.
So sit back, relax, and enjoy the cool comfort provided by your properly installed window air conditioner. Beat the heat and humidity with ease, all thanks to your DIY installation skills!